Aluminum is an absolute staple in pretty well any machine shop. It’s one of the most machinable metals out there, so it can be processed quickly and efficiently.
That’s also why it’s tough. Since everyone is cutting it, machining aluminum is a really competitive space. This is especially true of production machining.
In this article, I’ll share all you need to know to hit the ground running so that you can land some good jobs and handle them like a pro.
Table of Contents
Why Can Aluminum Be Challenging?
To start off, let’s go over what you’re up against.
If you’re making a bracket for Farmer Joe, it’s really not going to matter how efficiently you remove material. But if you’re making 10,000 brackets a week for Hustler Joe, you need to do a proper job.

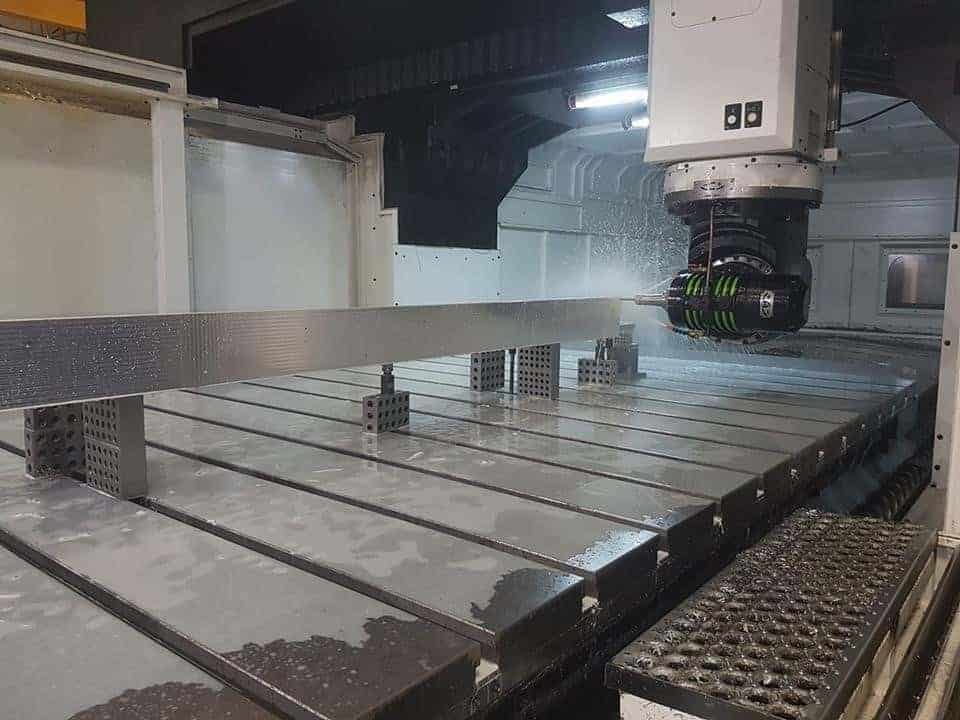
The main challenge with machining aluminum effectively is simply getting the maximum material removal rates without blowing something up.
Aluminum can melt and fuse to the tool if there’s too much heat. So even though it cuts like butter, it won’t for long if the aluminum sticks to the tool and you end up doing friction stir welding instead of machining.
Beyond keeping friction to a minimum, chatter can be a beast when you’re pushing the machine. This is especially problematic when you’re trying to machine clean looking pockets.
Ok, enough whining. Let’s get into how you can kill it on the floor.
Different Kinds of Aluminum
Not all aluminum grades have the same machinability. Some cut like a dream, others are so gummy that clogged broken tools become a nightmare. A key here is to understand what you’re working with.
Here’s a list of some common types of aluminum and some notes on machinability:
| 2011 | The butteriest of butters. This is pretty well the most machinable out of all the aluminum grades. The corrosion resistance is terrible, so it usually needs to be anodized, but seriously you won’t find an easier material to work with. |
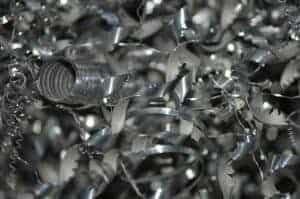
| 2024 | This has a great strength to weight ratio, so you’ll see it in applications where it’s under tension. It machines great, but there is one thing you need to watch for: It can chip at the end of heavy cuts with the tool breaks out. An example of a possible problem area is when doing full-diameter slotting. You might need to adjust your toolpaths to soften the exits to prevent this. The chips generally come out nice, they aren’t too stringy (but everything is relative). Another thing to watch for is corrosion. The corrosion of 2024 is actually really poor, so be careful about leaving it in thin coolant or parts tumblers. No point in having a great finish if it’s all corroded. Overall, though, this is great stuff to work with. Your best bet is to cut it in the T351 condition or annealed. |
| 5052 | This is really soft stuff, and it’s usually used for forming applications. Normally you’ll get this in sheet form. You might also find it in marine applications, since it’s got excellent corrosion resistance. It’s not horrible, but you do need to watch out for gumminess. It can clog a tool quickly. Make sure your tools are razor sharp for this stuff and you have great lubrication, or your surface finish will be galled and you’ll risk blowing up your tool. Keep your tool sharp and you’ll have no problem getting a bright mirror finish. |
| 6061 | This is the total staple for machining. It’s great stuff to cut. It’s probably the hands-down most common stuff you’ll find in a machine shop. You should still be careful with exiting the material on very heavy cuts; there’s a bit of a risk of chipping. The harder this material is, the easier it is to machine. T4 is ideal for machining, but T6 is a close second. Compared to 2011 aluminum, the machinability indexes of these tempers are 90% and 80% respectively. |
| 6063 | This is really similar in function to 6061, but this is more common to see in extrusions. However, it isn’t quite as stiff. This makes 6063 a little harder to machine; it’s softer and gummier. When you’re cutting aluminum extrusions, use really sharp tools, good lubrication, and watch your chip clearance. |
| 7075 | This is extremely popular in structural components like airplane wing spars and bike frames. It’s a really stiff aluminum. It machines pretty well; not as nicely as 6061 but not as bad as 5052. Getting a bright finish on this stuff ain’t easy though; you’re more likely to get something a little more like a smooth but dull grey. |
The thing to remember here is that all grades of aluminum are highly machinable. The only time that you’ll notice a difference between these grades is when you’re really pushing your machine. If you’re doing low volume production, it’s unlikely you’ll notice anything.
It’s worth noting that there is a noticeable difference between cast and wrought aluminum. Cast is always gummier, so keep your tools razor sharp and proceed with caution.
The main problems that you’ll see is in dealing with friction and heat. In the next section we’ll go over how to deal with these problems so that you can fine-tune your process.
Cutting Tools for Aluminum
Under no circumstances should you ever use a general-purpose cutter for aluminum. Technically it’ll work, but aluminum is totally different from steel.

Here are a few aspects of tool selection that will help you get the most out of your machine.
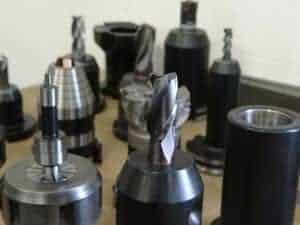
Cutting Tool Material
Carbide.
Hopefully that’s a no-brainer for you. Even in non-performance applications, carbide will exceed high speed steel in value for both cost of tool over service life and in surface finish.
Even still, there are a few good things to know about carbide that will help you match up the perfect tool to the job.
Essentially we just need to understand what we want out of a tool. Aluminum is soft cutting, meaning that the tool doesn’t undergo hard impact forces as it cuts.
What’s critical is maintaining a razor sharp edge. For this reason, we would choose hardness over toughness for material characteristics.
There are two main things that affect this property: carbide grain size and binder ratio.
For grain size, larger grain produces a harder material, whereas smaller grain produces a more impact-resistant, tough material. For aluminum, we want to maintain that edge sharpness, so we want a small grain size for maximum edge retention.
The other factor is binder ratio. For carbide cutting tools, the binder is cobalt. This could have anywhere from 2%-20% cobalt content. Since cobalt is softer than the carbide grains, more cobalt means a tough tool, less cobalt means a harder tool.
So we’re basically just looking for a carbide cutter that has large grain size and a low cobalt content.
Flutes
3 flutes is the sweet spot for solid carbide endmills 98% of the time. Chip clearance is the name of the game for aluminum, and 3 flutes give you that perfect balance of tool strength and chip clearance.
2 flutes can be a viable option where cutting forces are lower and chip clearances are more of a factor. This can also be a way to reduce cutting forces for light, iffy cuts. One area where this makes sense is when you have a very long tool that is prone to vibration. 2 flutes cut lightly, so it might help you deal with vibration.
At the end of the day, though, 3 flutes is the industry standard. For larger tools, like shell mills, this number of flutes sweet spot will vary by diameter. The key here is to have a huge amount of chip clearance so nothing gets plugged up. Nobody wants a constipated tool at 700 IPM.
Helix Angle
Here’s the balance we’re trying to strike: a slighter helix angle will reduce heat since it’s cutting for less time. A higher helix is smoother cutting, gives a great surface finish, but generates more heat.
If your tool heats up, the aluminum will weld itself on to it, and it’s game over. It happens in less that a second; all you hear is spindle load skyrocket and snap!
So here’s a solid rule of thumb that’s worked for me for years:
For roughing, a lower helix angle of about 35 degrees works great. This keeps the tool cool, and nobody cares about surface finish when roughing.
For finishing, a higher helix angle of 45 degrees is a total rock star. Sure it generates more heat, but for light finishing cuts at high feed rates, who cares? The smooth cutting leaves a beautiful and accurate surface finish.
For something that will do both roughing and finishing ok enough, go with a 40 degree helix angle.
Roughing: 35 degree helix angle
Finishing: 45 degree helix angle
Multipurpose: 40 degree helix angle
Worthwhile Features
Beyond those basics, there are a few other things that could give you that extra edge.
One thing that I’ve had great success with is polished tools. When the cutting flutes are polished smooth, the aluminum glides across them smoothly. Since there’s so little friction, the tool life goes through the roof and you can push them faster.
This is really worthwhile if you’re doing performance aluminum milling.
Another thing worth mentioning is tool coatings. In general, uncoated tools are the way to go. You won’t get much performance out of special coatings, and the more “standard” tool coatings will do more damage than good.
Here’s a quick list of some of the ok and the bad coatings for aluminum cutting:
| AlTiN | Horrible idea #1. This is a coating for steel, not aluminum. The surface of a tool with this coating isn’t particularly smooth, and there’s aluminum in it! This means that the material you’re cutting will have a tendency to weld itself to the coating, giving you a horrible surface finish and likely blowing up your tool. Not good. |
| TiN | Horrible idea #2. Not as bad as AlTiN, but not all that much better, either. |
| ZrN | Good idea #1. This has a super low coefficient of friction, so it can help with chip flow and keeping everything cool. |
| TiB2 | Good idea #2. A lot of guys prefer this over ZrN. This has a low affinity to aluminum, meaning that it slides right off. |
Ok, to be totally honest with you, I haven’t found coatings to make too much of a difference with aluminum. At least not like they do with steel. My go-to is simply a polished, bare endmill or insert. I’ll more so play around with the coatings when a salesman offers me free tools to experiment with. Insert devious chuckle here.
Feeds and Speeds
Lots of guys simply go with 1000 SFM to calculate their RPM. If you do this, you’re really not going any faster than everyone else.
To be honest, this is usually is what’s recommended for most cutters. 1000-1500 SFM is a totally normal speed to run your spindle at. With harmonic testing, though, you can hit 3x this speed. More on that later.
Feed rate is where a lot of guys chicken out. If you’re feeding a 1/2″ endmill at only 0.003″ per tooth, you’re just wasting time. For production, you want to push it at least at 1% of the cutter diameter per tooth. This means that 1/2″ endmill needs to be fed at least 0.005″ per tooth. With a stable setup and short tool, you might even be able to double that.
The only exception to this is when you’re working with small tools, like 1/8″ or less. Chip clearance can become an issue, which means that you’ll need to slow down for thinner chips.
At the end of the day, spindle power and RPM should tend to be the main factor that’s slowing you down for aluminum roughing on most machines, for average-sized parts.
Balancing and Harmonics
This is really what separates the boys from the men in the aluminum milling arena. Aluminum can be cut at extremely high speeds, but your tools need to be able to handle it.
Generally speaking, anything over 10,000 RPM needs to be well balanced. You’ll find balance ratings right on your tools, so match them up accordingly.
This should go without saying, but if you bump your tools in the machine, they’re no longer balanced. Also keep in mind that the entire tool assembly needs to be balanced. If you have an ER collet chuck rated for 20k RPM, but you mount up a boring head, that collet rating means nothing.

This is also true when it comes to determining cutter accuracy. Lots of guys totally overlook this, but carbide endmills will actually have a shank fit rating. This can make a big difference with some kinds of toolholders, like hydraulics. A tighter, more accurate fit will mean better balance, better tool life, and a longer lasting spindle.
Aside from balancing tools that won’t destroy your spindle at high RPM, harmonics testing is really an awesome advantage for machining aluminum. Since aluminum is so buttery, you can cut it at really intense speeds.
Harmonics testing will help you find those resonant frequencies of the tools and let you work out the sweet spot speeds and feeds. If the cutting frequency is off, the tool will start to vibrate like a violin string and you’ll have every reason to go home early.
Finding those sweet spots for tool frequency vs RPM is a big deal. This could boost your RPM from 7,000 RPM to 22,000 RPM, with the feed rates to match.
If you try to do this without the testing system, you’re guaranteed to explode your tools into a million sharp little pieces from the insane harmonics you get when you’re a little off.
At one shop where I worked, tap testing allowed us to run our 3/4″ endmills with a 10″ gauge length at around 22k RPM and 700 IPM. Sometimes we could go faster. Try and pull that off without harmonics testing. I dare you.
These systems ain’t cheap, and you obviously need a mill that can handle this high performance. When you have this as a shop capability, though, you’ll be way ahead of the general machine shop competition.
Machining Strategies for Aluminum
For most applications when milling aluminum, I’ve had the most success with old-fashioned aggression for getting good material rates. Things like peel milling is a waste of time the large majority of the time, except for when you’re working with very small cutters in cramped geometry.
The main reason for this is that the machines often can’t keep up with the extremely high accels and decels required to really take advantage of chip thinning when peel milling. You can’t have a 1,000-lb table turn on a dime at 1,200 IPM.
Ok, maybe a dime is a bad expression here. Dimes are huge. But you get the point.
Using traditional parameters like full width and 1/2xD depth of cuts generally work better in real life when cutting aluminum.
Common Operations for Machining Aluminum
Here’s a list of the common stuff you’re going to be doing with aluminum, along with a few tips to help you along.
Facing
If you’re going to use a shell mill, definitely go with a super aggressive rake angle and polished inserts. Your finish will be amazing and you’ll be able to really push the RPM.
Pocketing
This is something that a lot of guys don’t do right. If you step over half the diameter of the cutter and half down, you’ll be making a mistake for two reasons:
- The cutter can handle more. Go nearly full width. My go-to is 95% of the cutter flat. The reason for this is that the cutter will be buried in the corners anyway. This means that you’ll have to slow down the feed so that the tool doesn’t explode in the corners. If you go a full 100%, you might get papery wafers between the toolpaths because of cutter and material deflection.
- 50% stepovers are horrible for harmonics when you’re roughing at a respectable rate. The impact of the tool entering the workpiece is at the worst possible spot, slapping in with every tooth. Even bumping to tool over to 65% stepover will result in a noticeable reduction of chatter.
Another tip is to use a cutter diameter that’s slightly smaller than the inside radius of the pocket. If you’re using a 1/2″ endmill to cut 1/4″ rad pockets, you’ll have the tendency of gouging the corners with chatter as the tool changes direction. At high speeds, tools don’t change direction instantly, which means that the tool unloads cutting pressure. This is what makes those chirping noises.
I’ll usually ask if I can resize those rads to 0.265″ for clean corners. This reduces the contact that the tool has with the part geometry. The machine is also able to handle that rounded turn at higher speeds. Just think of a car on a race track. If it’s a sharp corner, the car slows down. If there’s a larger radius, the machine doesn’t need to slow down.
This will pretty well eliminate that chirping in corners that makes your parts ugly.
Slotting
For extremely deep slots, there are two options that work well for me: either use trochoidal milling to reduce cutter deflection and chatter, or use a stub flute endmill.
Personally I prefer stub flutes, since the tool is significantly stronger, and you don’t get any wasted motion as the tool zips back and forth. Deep slotting is one of those applications where it’s often worthwhile to use a specialized tool.
For shallow slotting (4xD and under), no special considerations need to be made. Just give’r.
Drilling
Use. Sharp. Drills.
Carbide drills isn’t always the answer; there’s not really any point in running an expensive carbide drill if you don’t have the spindle RPM or production volume to justify it.
Generally speaking, just use a 135-degree split point drill and you’ll be ok. If there’s a web on the tip of the drill, you’re putting a lot of unnecessary heat in the cut.
Tapping
General-purpose taps technically work, but taps specifically for aluminum are significantly more reliable. They have a much more aggressive rake angle, which means cleaner cuts and less heat.
Also, don’t be a wimp with RPM. If you never go over 200 RPM on your machines, you’re just wasting time.
Of course, some machines are just old and tired, and there’s too much backlash to cut any faster. Really, though, you’re not going to be competitive on these machines anyway.
Point is, tapping aluminum is easy, don’t waste time on it.
How to Get Awesome Surface Finishes on Aluminum
High RPM. It’s not much of a secret. Crank it.
Using a finishing tool that’s razor sharp, high helix, and with very aggressive rake angles will also help you out with getting a super shiny surface finish.
One thing worth mentioning though is that you don’t want to waste your time making the part prettier than it needs to be. Sometimes you’ll just want to make the customer happy and impress them, but remember that there’s a difference between shiny and a high Ra.
It’s really worth it to do your surface finish calculations so you can determine the max feed rate for your finish cuts. I’ll usually do the math, and then back it off about 10% of that to be safe. If you straddle that edge, you’ll be wrong half the time.
Cutting Fluid
Never cut aluminum dry. The guys that do this on YouTube are only doing it so you can see what’s going on. In real life (and behind the scenes) cutters blow up when they plug up from melted aluminum building up on the edge.
A lot of companies will tell you that coolant type makes a huge difference for things like tool life and surface finish quality. Does it?
Kinda, but nothing huge.
Really, the only time I’ve really seen a noticeable difference is when every other factor is dialed in perfectly.
Here’s the order of operations for how I would approach process improvement:
- Cutting parameters – stepover/stepdown, feed rate, RPM, toolpath
- Cutting tool geometry – suitable for aluminum and the type of operation (roughing, finishing, etc) – helix angle, carbide grade, number of flutes, etc
- Cutter coatings/finish
- Coolant
Ok, well that’s pretty well it. Of course, there’s a lot more to learn with cutting aluminum that will let you smoke the competition, but this is an article, not an e-book.
Ultimately, if you really want to excel with aluminum, you’ll need to do some experimenting of your own. Work with your tooling reps to come up with awesome solutions to improve your processes.
If you’re interested in learning some more machining tips, here are some articles that I’d really recommend that you take a look at:
What is High Speed Machining and How You Can Do It
Machining Square Inside Corners: Conquer the Nightmare! (tips on how to design great corners for milling)