If you’re not used to it, stainless steel can be absolutely brutal for drilling. You might end up burning through bits faster than you can load them. But if you know how to do it properly, it really isn’t that bad.
How can you drill stainless steel? Drilling stainless steel needs to be done with sharp bits, low RPM, higher cutting pressure (feed), and lots of lube/coolant. High RPM will lead to immediate burned-out drill bits.
Beyond that, there are a few other tips that can help you get the job done, like how to keep everything stable and how to choose the right bit.
Table of Contents
Realistic Drill Sizes
Since stainless is a tougher material, it’s important to be realistic in terms of what sizes of holes you can make with the tools you have.
If you’re using a hand drill, you’re generally going to be limited to a size range of 1/16″ to 3/8″ in stainless. Anything bigger or smaller than that is going to be iffy.
On a drill press, the process is more stable since the setup is more rigid and the bit is more accurately align. Depending on the torque of your machine, you can actually drill some pretty large holes.
The point of all this being that if you need a 2″ hole and only have a cordless drill, seek professional help. Or get a hole saw.
How to Get the Right RPM
Running a drill too fast in stainless is hands down the most common thing that I see people do wrong.
This can be tricky if you’re using a hand drill, but most drill presses or other similar machines will give you at least a general idea of what RPM you’re running at.
If you are using a hand drill, there is usually some kind of marking on the drill to indicate (at the very minimum) the maximum RPM of the tool. That can give you a kind of ballpark idea of how fast it’s running.
The RPM to run the drill at will depend on the size of the drill bit. The larger the drill, the slower you need to run it.
Instead of getting into a whole discussion on the math involved in finding the perfect RPM for your drill bit, I just made this really simple calculator for you:
The Right Kind of Drill Bits
Not just any drill bits will work well on stainless.
For the sake of stating what should be obvious, the drill bits need to be for metal, not wood or masonry.

This means no spades, augers, Forstners, brad points, or rotary percussions. Those are not for metal.
Even for the drill bits that say they’re for “metal”, they might not be up for the task of putting holes in stainless.
For example, I’d highly recommend NOT using a simple carbon steel twist drill. The cutting edge will wear down in no time and you’ll end up muttering a lot of colorful language under your breath.
At a minimum, use High Speed Steel (HSS) drill bits. Ideally, get ones with cobalt. They cost more, but they are significantly better for tough materials.
They perform better in higher heat situations, as is typical with stainless, and they help dissipate the heat as well.
Once you try cobalt, there’s no going back.
Pro Tip: Not all cobalt drills are created equal. They have different grades based on the amount of cobalt in them. M35 has 5% cobalt and M42 has 8%. More cobalt means that the cutting edges stay sharp for longer. These ones are great and are really well priced (Amazon).
Use a Lubricant
Stainless steel is actually pretty abrasive when you cut it. If you’re drilling it dry, the cutting edge will wear down extremely quickly.
Lubricants also help keep both the drill bit and the workpiece cool. Stainless does something called work-hardening when it overheats.
Basically, this just makes a hard spot at the bottom of the hole, and you’ll quickly burn out drills that contact this hardened area.
One of the simplest ways to lubricate the drill bit is to hit it with some WD-40 as you cut.
Pull the drill bit out of the hole, spray some oil on the bit, drill for a few more seconds, rinse and repeat.
The down side to using WD-40 is that it’s an extremely light oil and it can get pretty messy.
Something that works even better is cutting wax. It will stay on the drill for longer and be much tidier. This stuff works great.
Apply Cutting Pressure
This one might seem a little counterintuitive.
There’s a bit of science that goes into metal cutting that’s pretty interesting.
Any metal cutting generates heat.
There are three things that can heat up:
- The cutter
- The workpiece
- The chips
If the heat goes into your drill bit, your drill bit will burn out. If the heat goes into the workpiece, the metal will work-harden.
However, if the heat goes into the chips, then the heat gets pulled away from the cut zone and everything works like a charm.
One of the keys of success here (aside from using a sharp bit) is the make sure that the chips are large enough to handle the heat. This means you need pressure.
Basically, if you don’t apply enough pressure to the drill, the bit will rub instead of cut, and disaster ensues.
If you’re drilling by hand or on a press, the key is to pay attention to the chips.
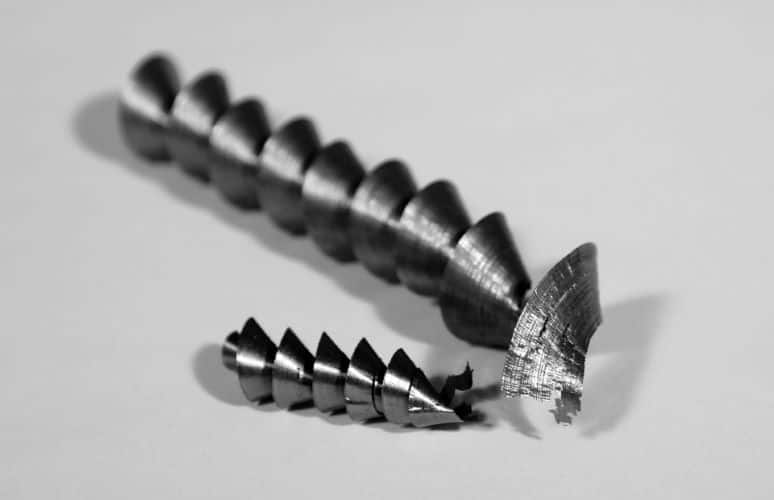
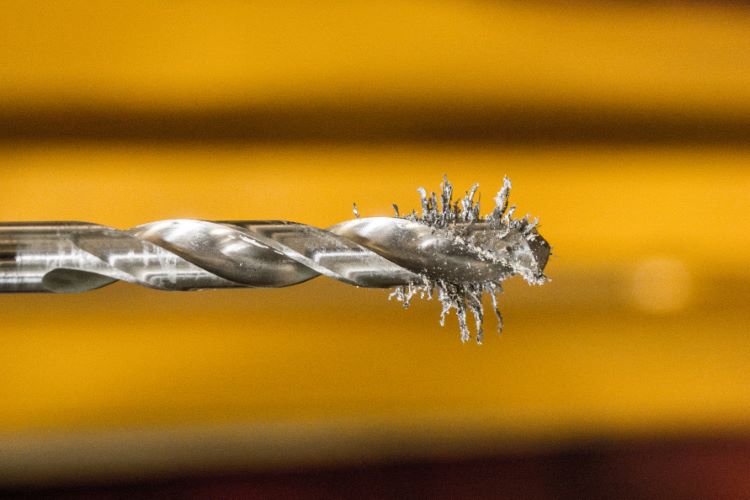
The chips should come out as continuous spirals if you’re hand feeding. They should not look like furry stacks of slivers or dust.
They should look like this:
And not like this:
Typically stainless isn’t magnetic, but poor cutting conditions can actually cause it to become magnetized. If you see this, you’ll need to double check your cutting pressure and make sure that your bit is still sharp.
Cutting pressure doesn’t mean putting all your body weight into the drilling. That would be dangerous.
Basically, you just want to apply firm enough pressure that the chips come out cleanly and don’t generate excessive heat.
Keep the Drill Straight
This mostly applies to drilling by hand, but I’ve seen guys mess this up on a drill press too.
Drills aren’t meant for side pressure, and stainless is really unforgiving.
Pay extra attention to how straight you’re drilling stainless. Otherwise, the shank of the drill will rub into the side of the hole, making it oblong, and you’re running a really high risk of snapping the bit.
If you’re drilling by hand, the results of a snapped bit can be painful.
On a drill press, make sure that the drill doesn’t wander off center and introduce side pressure. Generally this happens when you’re drilling on a non-flat or tilted surface. You’ll see the bit flex as it engages at the bottom of the hole.
An easy fix for this is to clamp the workpiece, and start drilling the hole. Once the drill is past the tip angle, turn off the spindle.
Unclamp the workpiece and apply gentle pressure with the non-rotating drill bit to center the hole under the drill.
Then re-clamp the workpiece, fire the drill back up, and go to town.
Drilling stainless is always a bit trickier than regular carbon steel, but if you follow these directions it should go fairly smoothly.