It’s always great to find an old mill in good shape sitting untouched in someone’s shop, and even better when they let it go for a few hundred bucks. Regardless of how pretty and cheap (or ugly and expensive) it is, you’re gonna need to find a good way to move it.
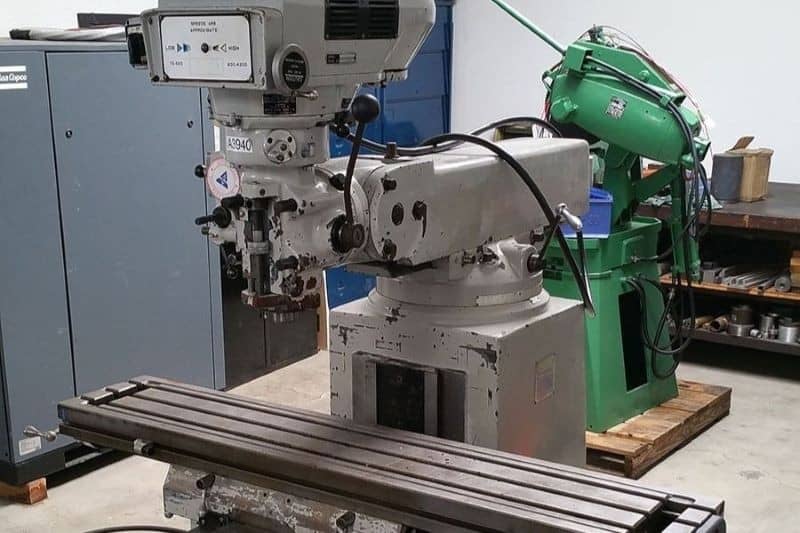
How much does a mill weigh and how can you move it safely? A standard Bridgeport-style vertical knee mill will weigh about 2,000 to 3,000 lbs, depending on when it was made and what options it has. To move it, there should be a threaded hole on top of the ram that’s a hoist point. Thread in an eye bolt and start hoisting.
That’s the short answer. I’ll go over some more information that you might find helpful in this post. First, a few more examples of mills and what they weigh. Then I’ll go over the proper procedures for moving them, along with a few tips that can make the job go smoothly-ish.
Table of Contents
Examples of Milling Machine Weight
Obviously, there are all kinds of mills out there. In this post, I’m not getting into the massive horizontal boring mills or things like that. You’re better off searching high and low for that machine manual. Try not to crack the spine when you open that book for the first time. That old glue can get brittle.
If you don’t have the manual, you could also try checking the nameplate on the machine. It usually has information on there like machine weight.
Anyway, for the older machines, the standard Bridgeport Series 1 will usually weigh between 1800-2400 pounds, depending on which head is mounted to it and its age. A Series 2 Bridgeport is double that at 4,000 lbs (although they’re not nearly as common).
A really handy reference guide is in one of Sharp’s machine catalogs. They make Bridgeport-style machines and are reasonably in the ballpark in terms of weight. You can find that PDF here. Just scroll down to the bottom and you’ll see their comparison chart of their machines, which include things like machine size and weight.
Just try to match that up to the machine you’re looking at moving.
How to Move a Milling Machine Safely
Before I start listing steps, there are a few really obvious safely notes:
- If it seems iffy, it ain’t safe.
- Take your time. It’s better to be an hour late than to no longer have the use of your right hand.
- Carefully read the max ratings on any lifting equipment and abide by them.
- Always have a spotter around. You can’t see the other side of the machine when you’re moving it, and you might not notice it tipping, either.
- Remove all the handles and the DRO. They break really easily if you push on them accidentally.
Ok, so there are a few different ways to tackle this. Here are a few methods.
Lifting by Forklift
If there’s a solid base, you should be able to slide the forks under it fairly easy. Most milling machines will have feet in four corners and gaps in the middle of the base to accommodate forks.
This is honestly pretty straightforward. If you can get the forks under the machine, get some thinner boards like plywood or 1×4’s or something, use a prybar to lift it up on one side, slide the board under, repeat on the other side, etc. until it’s high enough for the forks.
Also, make sure that you know how to safely operate a forklift. Keep the forks as low as possible. It really sucks when you drop a mill from 2′ up. If your forks are nearly touching the ground, you’re way less likely to break the machine or hurt someone.
Lifting by Hoist or Crane
My preferred option. This is where you can used that hoist point (a threaded hole to accommodate an eye bolt) on top of the ram.
First, though, you need to balance the machine. The ram should have a mark at the balance point, so slacken off those bolts and slide it into alignment. You should also center the table in the X direction.
If it doesn’t have a mark, use your best guess. The eye bolt should line up to where the middle of the weight of the machine is. Test it out by lifting the machine slightly and seeing if it tilts or lifts off the ground evenly. If the machine tilts forward, slide the ram further back and vice versa.
Even for something simple like this, I prefer to take off the handles. It’s just way too easy to bump and break a handle when you’re maneuvering a machine out of a tight space, so it’s worth taking the 5 minutes needed to strip off the sensitive bits.
The Manual Approach
This is the most work, but it’s honestly not as intimidating as it sounds. Especially on a 2,000 lb machine.
Basically, just disassemble it. It all comes apart in several manageable chunks, and the whole assembly/disassembly shouldn’t take more than a day. It’ll also give you a chance to notice anything that might need maintenance.
Here are some basic steps, although there are several ways to skin a mill. I wrote out the steps, then added a few videos at the end that more or less show how to pull a bridgeport apart piece by piece.
Step one. Clean the machine. Greasy, chip-filled machines are a pain. Plus it’s just good manners.
Step two. Get your phone handy so you can snap pictures of how you took everything apart. Even if you’ve stripped a mill three times over, it’s a good backup to make sure it goes back together right.
Step three. Remove handwheels, DRO, collet rack, and all that other easy to access stuff that’ll just get in your way.
Step four. Attach straps to the head. Use either an engine hoist, A-frame, or ratchet straps from a beam from the ceiling. The head will weigh a couple hundred pounds, so it’s nothing crazy to lift if you’ve got two guys. You just don’t want it falling when the last bolt is off, so secure it snugly. There should be four bolts on the front that you can remove, which will detached the spindle and the motor as one big piece. Keep in mind that most of the weight will be towards the motor.
Note: If you’re doing this on manpower, it’s handy to have a table or bench nearby to set the parts on. It’s a real pain in the back (literally) if you have to set them down on the ground.
Step five. Remove the ram/turret. There should be four bolts near the base of the turret. This one’s pretty straightforward, just make sure that the ram is retracted and it won’t tip forward. Once it’s loose, two guys can lift it off.
Step six. At this point, you might have removed enough weight on the machine to be able to wiggle the machine up on a pallet with a prybar. From there, it’s just a matter of using a pallet jack or something else sturdy with wheels to move the machine around.
The advantage to taking off the ram and the head is that the machine is no longer top-heavy. If you’re carrying it in your pickup truck or trailer, it’ll be much more stable. Either way, remember that straps are cheaper than your machine. Use them liberally.
At this stage, this might be as far as you need to go. If you’re trying to get this into your basement, however, you might want to take it apart in a few more pieces. If that’s the case, let’s continue.
Step seven. Remove the table. You’ll have to remove the handles on either side along with the mounting brackets, then take out the lead screw, then slide off the table. The table is pretty heavy, so it’s ideal if you can “catch” it with forks, a table, or something similar. Don’t rush this step.
Step eight. To get the saddle and knee off, you’ll need to disconnect the oiling lines. Then pull off the way covers.
Step nine. Unscrew the lead screw on the saddle. Pull out the gib, the feed nut bracket, and slide the saddle forward and off the dovetails. One guy can lift it, but two is better.
Step ten. Raise the the knee as high as it’ll go. Yank out the elevating crank and shaft (the crank that moves the knee up and down) along with the bevel gear.
Step eleven. Remove the way guards and the gibs on the knee. Make sure that it’s all loose and start lifting. This thing is stupid heavy, though, so you might want to winch it from a ceiling or something. Take your time on this one.
Step twelve. The machine is pretty well broken down into what should be manageable pieces.
Notes. If there’s any way possible to rent a forklift or a Bobcat with forks, you seriously will not regret it. It just makes this job so much easier.
Expect that just taking off the top half will take about 4 hours or so, and the complete teardown will take a day. This is a really good opportunity to clean the machine thoroughly and inspect the wear and tear.
Ok, here are those videos of the teardown that I promised:
Another handy reference: Here are two diagrams of a Bridgeport so you can see how they go together. Keep in mind that the clones are just that; pretty well exact clones. In fact, many of the pieces are interchangeable.
Ok, that should be enough info to see you through. Try not to break anything.