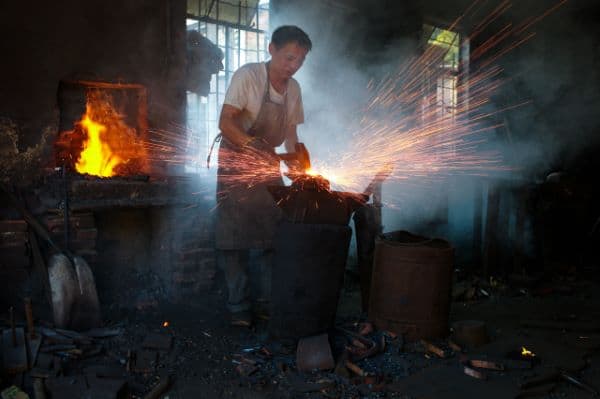
Besides all the regular uses, forge welding is necessary for anyone that wants to try their hand at making Damascus steel. There are many ways to do it, and each person generally has their own preferred method.
One of the frequent questions that comes up is whether or not to use flux, and if you do use flux, what kind should be used.
In this article, I’m going to go over the pros and cons of different available fluxes and methods, along with a few tips for those starting out.
One thing to keep in mind though is that it’s a really good idea to try out a few different methods for forge welding. Don’t marry the first one you try, experiment even after you get good results and you’ll potentially find something even better.
Table of Contents
Different Kinds of Fluxes for Forge Welding
There’s about a half dozen popular kinds of fluxes that are popular. I’ll go over some of the main ones, why you might want to try them, and then get into the possibilities of going fluxless.
Borax
This is probably the most common of all the fluxes. The reason is that it’s cheap and it works well, which are the two most important factors that forgers are concerned with.
One of the most popular brands for this is from 20 Mule Team. You can pick some up here on Amazon. The reason that people use this one is that there are no additives (it’s usually used for laundry), it works great, and it’s cheap.
It’s a powder so you just sprinkle it on as the metal is getting hot to prevent oxygen from scaling up the forge area. Start using it once you get a red heat at the latest, and keep applying more as you get up to the orange/yellow forge welding temperatures.
Pro tip: As borax heats up, it melts into a glass-like coating that will contact the bottom of your forge. This will eat away your firebricks fairly quickly, especially soft ones. This isn’t really a problem for coke/coal forges, but definitely an issue for propane forges.
To prevent the bottom of your forge from eroding, try one of the following:
- Place the metal on top of a sacrificial fire brick that’s easy to replace. You might want to opt for one of the hard ~1″ thick ceramic bricks like the one here.
- Kiln shelving is another option that may be cheaper in your area. They’re generally thinner so they might be suitable if you have a smaller, cramped forge.
- Put a junk steel plate under your workpiece that will just need to be replaced regularly. This is a less than ideal option, but it will protect the bottom of your forge.
Anhydrous borax: This is a term that you’ll hear thrown around the forging community. It’s when you bake out all the moisture from the borax before you use it. It has mixed reviews on whether it’s worth the effort.
One thing to keep in mind is that anhydrous borax needs to be stored in an airtight container, or else it will re-absorb moisture from the air.
Pro tip: all the borax needs to be hammered out methodically, or you’ll get inclusions and imperfections that you’ll never get out. This is usually done by hammering from the center outwards, so the borax squeezes out like from a tube of toothpaste. It takes a bit of practice to get right.
Keep in mind that everyone has their own way of forge welding, so you’ll probably hear people use other methods. Just experiment and practice, don’t expect great results on your first few tries. Or your first few dozen tries, for that matter.
Kerosene
Some people use this in addition to borax, or on its own.
While your workpiece is cold, dip it in kerosene, then put it in the forge. The reason that this is a good option is that you do it once and can basically forget about it.
How it works: The kerosene will burn off but leave an oily residue on the metal, which turns to carbon. This will protect it from oxidation. Also, this might slightly raise the carbon content of the steel in layers.
I say might because this is just what I’ve heard from other guys that use this method. I haven’t tested it in a lab or anything to get definitive answers.
Anyway, you can try this method on its own, or sprinkle borax as you continue to work the weld shut for added protection. Kerosene is dirt cheap and readily available, so it really doesn’t hurt to try.
Brake Cleaner
This is used in the same way as kerosene, but I’d really encourage you to not use it.
The reason is that there can be some really nasty additives, and this can be a poisonous (to the point of deadly) method.
Since there aren’t any real advantages of brake cleaner over kerosene, I’d recommend that you not even try it. Just use kerosene.
No-Flux Forging
This is becoming more and more popular. The reason is that more and more people have access to TIG/MIG welders.
I personally prefer TIG welding since it’s cleaner, but MIG will work too.
To use this method, the stack of steel that you’re forging needs to be dead clean and sealed. Grind each side of the metal plates as flat as possible (or mill them, if you have access to a machine) and sandwich them together in a vise so that there’s no air gaps or contaminants.
Then weld the seams shut. I like using TIG because you can just fuse them metal together without using filler rod. This ensures that your material is consistent.
If you’re using a MIG welder, you’ll need to grind away the weld later on or you’ll have low carbon areas. TIG doesn’t have this issue.
Once you’re satisfied that your stack is sealed air tight, just heat it up to forge welding temperatures and hammer away.
Pro tip: You might have better success starting off with a squeeze in a hydraulic press before you hammer, if you have access to one. If you’ve done a good job welding, though, going straight to hammering can work fine. Just be careful not to bust apart your welds.
Even if you’re using this stack welding technique, technically borax or kerosene doesn’t hurt. So you might want to use some anyway just as an extra insurance policy.
Canister Welding
This is another way of keeping contaminants away from your material. Here’s a quick explanation of how it works:
Cut a piece of steel tube and weld a cap on one end. Make sure your weld makes a seal. Pour in white-out (like what you get from an office supply store) and line the inside of the tube. Then fill the tube with the pieces of metal that you want to weld. Fill voids with metal powder.
The whiteout contains zinc, which will form a layer between the low-carbon tube and the high-carbon billet that you’re welding. This will make it much easier to remove the canister once you’re done squashing it.
Pro Tip: For knifemakers (who are usually the ones interested in canister welding), it’s important properly select the type of metal powder you’re using. Here’s an overview of the most common types:
- 1095 steel is high carbon, and great for edge retention. Use this for blades that aren’t too large.
- 1084 steel has slightly less carbon, so it doesn’t have quite the same edge retention. However, it’s less brittle so it’s good for choppers and longer blades, since it’s less likely to crack.
- Nickel-based powder will not hold an edge nearly as good as 1095 or 1084, but it’ll provide a really noticeable contrast on Damascus. Use it sparingly so that your edge doesn’t suffer.
Once your can is full to the brim, weld the other cap on. Then heat it up thoroughly to yellow, and forge weld on all sides.
A common approach is to use a press with angle iron welded on a plate (called squaring dies). This allows you to squash the canister from all sides at once, which is the ideal way to set the weld.
Once you’re confident that everything inside is set, slice the can open and pry out the billet from inside.
For canister welding, you really don’t need flux unless you’re going to do additional Damascus layers. That said, the kerosene dip doesn’t hurt, just in case.
This video shows how this is done:
I wouldn’t personally use washers to make a knife since it’s really unlikely that they have enough carbon, but either way you get the point.
Other Tips for Forge Welding
Forge welding is a basic skill for blacksmiths, and there’s a lot more to it that just figuring out how to use or not use flux.
One thing to understand is how to use a reducing flame to keep as much oxygen away from the steel as possible.
The quick explanation of this is that you want a fuel-rich flame so that excess oxygen is burned away quickly around the steel. For propane forges, this is a matter of adjusting your burners to limit oxygen intake.
For coke/coal forges, this is a matter of where you place the steel. Keep in higher in your fire, where the oxygen has been mostly consumed. Keep it further away from the incoming air.
Here’s a video that explains some of these basic concepts. It’s a little bit slow moving, but if you’re serious about forge welding, it’s got a lot of good information that explains the fundamentals:

